DIY? More Like D-I-DYE, Amirite?

Sorry.
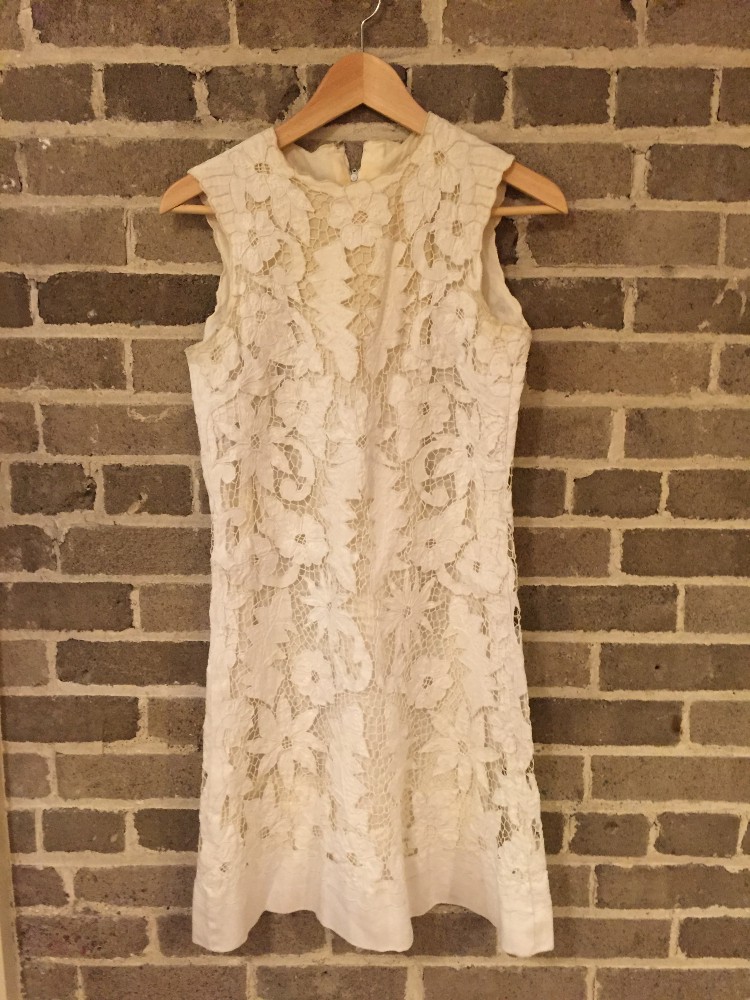
DIY dyeing is an extremely frugal way to reinvent previously-owned clothing, and it requires truly no experience with anything even remotely crafty. Unlike sewing, this is a project to which my impatience is suited: throw an old, dingy item in a bucket and watch it emerge new as from a chrysalis. I bought the dress above over 10 years ago at a vintage store in Vancouver for about $50. It has no tags — looking at the stitching, I think it might actually have been handmade. It was a favourite of mine for years, but had yellowed with age (and sweat) past the point of wear. Yet, despite bouts of manic purging, I had carted it with me from Vancouver to D.C. to New York to Toronto. After reading a boatload of online tutorials, I decided to take action.
Sink or Bucket technique #RitDye
First, pick your dye. I went with RIT ($4.50/bottle) since that’s what was readily available at Michaels, but people say great things about Dharma Dyes. If you want to get super hippie, you could also try brewing your own natural dye from tea or flowers, but I’m a basic bitch. Remember that the colour won’t necessarily be as it appears on the box or bottle — it’ll depend on the original garment colour and how the fabric reacts to the dye. Generally, darker dye colours are easier to work with. If I were more experienced, I might have tried mixing a custom colour — my ideal would have been a washed-out teal, something light enough that you could still see the embroidery on the dress — but I decided to pick something standard and dark (navy blue), hoping for the most coverage.
Prep your area. There are a bunch of different dyeing methods, including using your washing machine (I wasn’t gonna tempt fate with this one, as I use my landlord’s washer) and working on a stovetop. Billfold commenters recommended the stovetop method, but I didn’t have a pot I was willing to trash, so I went with the sink. I have a stainless steel kitchen sink — if yours is porcelain or surrounded by that gorgeous rich person white granite, use a large bucket or storage container. Have an old towel on hand, as well as something to stir with (I used my hands in the end), rubber gloves (preferably ones without a hole, see below), salt or vinegar, and something to watch/listen to while you’re stirring.
Wet your garment. I did this by filling the little baby sink next to my bigger one and putting the dress in there to soak. If using the sink method, fill up your monster sink with hot water. I used a mix of hot tap water and boiling water from the kettle. You want enough in there that you can easily swish the garment around.
Add your magic ingredients to the water. You’ll need some salt and/or vinegar, depending on the fabric you’ve chosen to dye (salt for cotton, vinegar for silk, wool, and nylon). I had no idea what mine was, but I guessed some kind of cotton-linen blend. Roll the dice! I dissolved about half a cup of salt in some boiling water and added that to the full sink. I also added a couple of drops of dishwashing detergent. Then I shook the dye and added the whole bottle. Did I need to use the whole bottle? Probably not. There are measurements on your bottle, but ultimately I thought more dye would be better since I wanted to ensure I covered the discolouration.
Now, with gloves on, add your garment. Smoosh it down and proceed to smoosh/woosh around for an entire episode of Grace & Frankie, or about 30 minutes, whatever comes first. Keep wooshing. Don’t stop wooshing. I wooshed with my hands, although other people say you can use a stainless steel spoon.
After 30 minutes, rinse. Once Grace has gotten her rocks off with the ex-con, drain the sink and rinse your garment in warm water, gradually cooling things down until the water runs clear off the garment.
Carefully carry the garment to a washing machine, if you have access to one, and give it a wash in warm water. I did my dress on the hand wash cycle and threw in the old white towel that I was using for cleanup. That towel is now purple, so do not put anything in the washer that you don’t want to turn wacky.
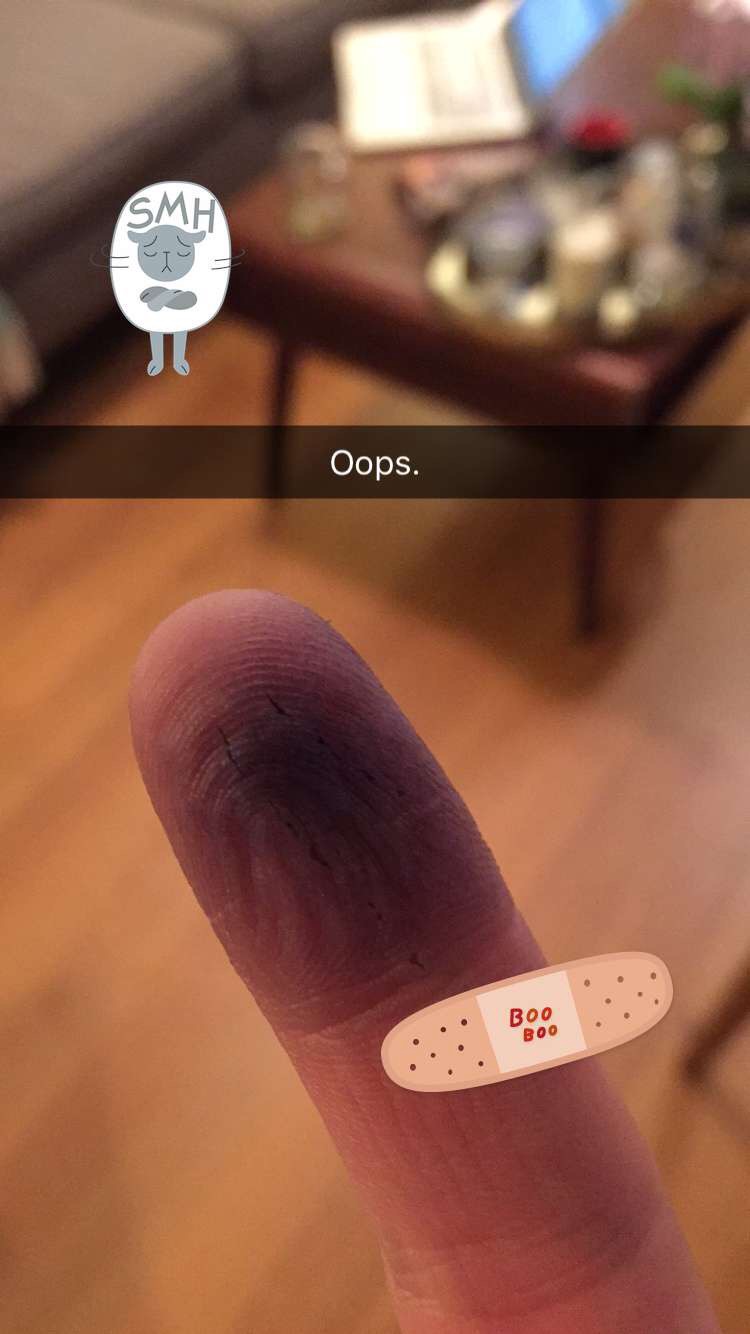
Clean up your workstation with soap and water and some bleach if you’re concerned about staining. Regular dish soap worked fine on my sink, although I was a precious pumpkin and didn’t splash (much). My finger did not fare as well: turns out there was a hole in one of the glove tips.
Once your garment is done sudsing up, hang to dry. If you handwashed or didn’t use a spin cycle, make sure to hang where any errant drips won’t result in a stained floor.
WELL LOOK AT YOU. You have a whole new wardrobe and it only cost you $4.50. Put it on, prance around, revel in your superiority. “Oh, someone ELSE dyed your clothing? How…quaint.”
I was super happy with the way the dress turned out — the dye took evenly to the lining and the lace overlay, and the colour is a nice, rich blue. Truthfully I preferred it when it was white, but short of ripping out the lining and replacing it or attempting a bleach job, it was unwearable. Beggars with super sweaty cleavage can’t be choosers.
Support The Billfold
The Billfold continues to exist thanks to support from our readers. Help us continue to do our work by making a monthly pledge on Patreon or a one-time-only contribution through PayPal.
Comments