What To Do When The Floor Caves In
by Rebecca Pederson
Rebecca Pederson and her boyfriend Nate bought a house in May, and every weekend since has been a DIY adventure. Last time: Linen closet. This time: Rotting floorboards.
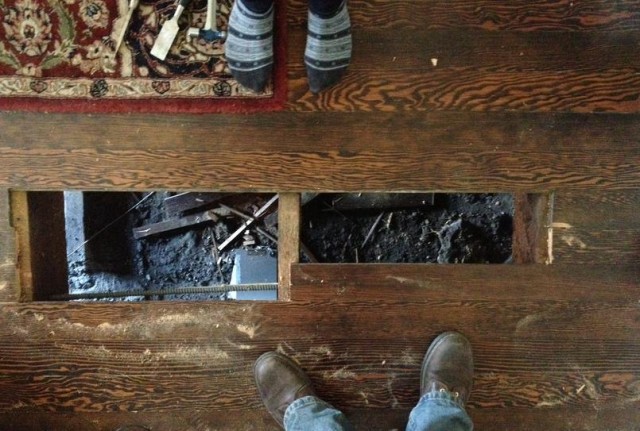
Sometime between when our house was built in 1898 and when we moved in this May, there was a termite infestation. We discovered this one night after settling in to the living room for some quality time with our Oz DVDs. My boyfriend Nate was standing next to the TV, fiddling with the remote, when half his leg fell through the floor.
After he dislodged his kneecap and retrieved the broken boards (which had landed in the basement because our house has no subfloor), we discovered termite tracks. Panic ensued.
He took to the basement with a flashlight while our dog nervously paced around the hole, giving me side eye like we had uncovered a portal to hell. The boards on either side of the hole were also damaged, but there was no obvious sign of a current infestation. Panic slightly subsided.
Since we’re determined to not involve home improvement professionals until we really, really break something, Nate watched Youtube videos on replacing floorboards while I Googled “how do you know if your house will fall out from under you while you sleep.”
Feeling confident he could solve this crisis himself, we embarked what turned out to be a month-long journey to replace our rotting floorboards.
Supplies we used:
– replacement floorboards (depends what you need, but we bought four six-foot lengths of flooring for $65)
– acrylic putty for filling in gaps ($30)
– stain and sealant ($20)
– circular saw ($0 — ask your dad or someone’s dad for this, I’m sure he has one)
– chisel ($10)
– hammer ($0 — isn’t it weird how everyone, even the least handy person in the world, magically owns a hammer?)
– nail punch ($3)
– sand paper sponge ($8)
– foam brushes (like 10 cents each but they fall apart if you look at them cross-eyed so buy as many as you can carry)
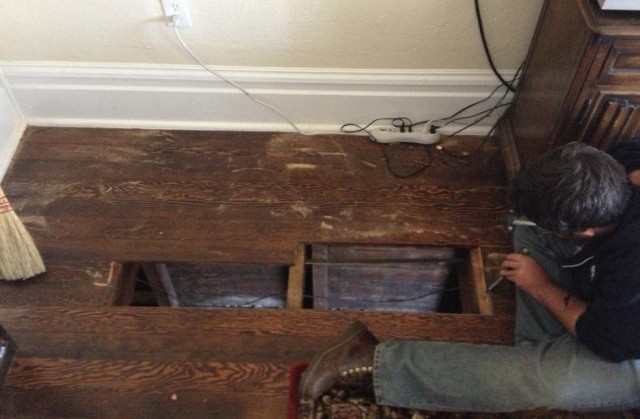
Step 1. Remove all floorboards until you come to ones that aren’t damaged. Cut the damaged boards out with a circular saw CAREFULLY to make sure you don’t slice through any joists, which are the crossbeams that hold your floor in place.
Step 2. Buy fresh floorboards unsullied by termites. This step is harder than it seems, because you have to find a speciality store. You can’t find single floorboards at a regular building supply store like Home Depot because they only sell flooring systems for redoing whole rooms in your house.
Nate went to a hardwood flooring supply company. Because they cater to professional installers, they are only open Monday through Friday, so he had to take time off work to go.
He bought tongue and groove boards. These boards have a slot on one end and a ridge on the other, so they will interlock with one another when you install them. Tongue and groove boards will give you a sturdy floor that doesn’t give out while you’re standing on it (hopefully).
Step 3. Use a hammer and chisel to cut clean edges around your floor hole. Then cut your replacement floorboards to the right length using your circular saw. Before you insert your last new board, cut off the bottom of the board’s groove; it won’t slide in place otherwise. Nail the boards to the floor joists using a nail punch so you don’t scratch the surface of the wood.
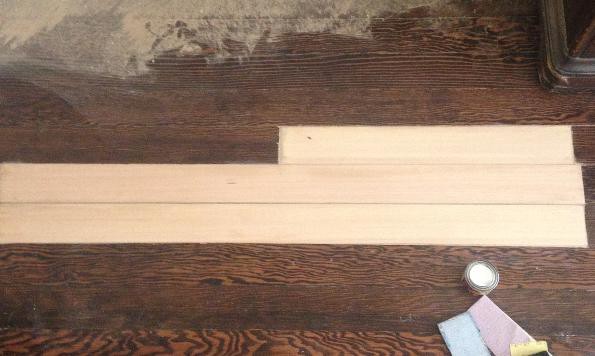
Step 4. Our new floorboards were slightly narrower than the originals, so Nate used an acrylic putty adhesive to fill in the gaps and bond the boards together.
Step 5. Sand your new floorboards and putty down like crazy until they are smooth and beautiful.
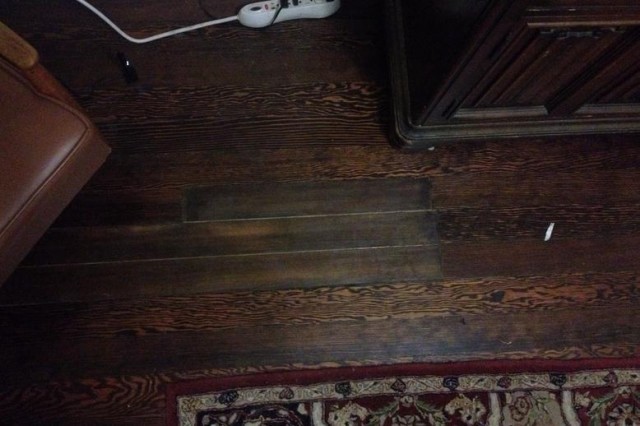
Step 6. Stain your floorboards to something that is hopefully the same color as the rest of your floor. If it dries to the wrong color, just be like, “Whatever!” and say you’ll buy a rug to throw on it later, but then eventually stop caring about the mismatched spot and go on with your life.
Rebecca Pederson is a writer living in Oakland // photos by rebecca pederson
Support The Billfold
The Billfold continues to exist thanks to support from our readers. Help us continue to do our work by making a monthly pledge on Patreon or a one-time-only contribution through PayPal.
Comments