How Upcycling Helped Curb My Spending
by Tatiana Jimenez
I don’t know about you, but as a girl who once utilized The Mall, and way too many pricey concerts as a way to escape the stresses of being a full-time student, plus working two part-time jobs, mama graduated college with a handful of debts to pay. My thought process at the time was, “Once I graduate, I’ll be able to pay all of this back within a few years.” And while I thought this was a perfectly reasonable idea at the time, that debt pay-off didn’t exactly happen as quickly as I’d planned.
Fast forward almost six years, and I’m now a lady who has a firm grip on her finances, has been consistently contributing to her 401(k) for the last three years, has an okay emergency savings, and is aggressively paying down her stupid credit card debt (credit card debt is so avoidable! Never again!). Money management is a lot like muscle memory. The more you practice, the easier it becomes, and over time, you’re able to do it without even putting a lot of thought into it (after a while it won’t hurt as much to walk away from that Urban Outfitters “Yard Sale” empty handed), and before you know it, you can’t remember how it was once even possible to not know how to manage your money.
There are a handful of rituals I’ve practiced over the last few years that have really helped to curb my spending, but the one I’d like to share is what I call “Upcycle Sundays”. This idea started three years ago when I was living at home for a few months to save money before moving to San Francisco, where I currently live. I made a point to stop shopping at the mall — because I really couldn’t afford it — and instead turn my shopping into a creative endeavor that I could afford. I would pick up gems from my local thrift stores for upcycle projects that I’d work on on the weekends, usually on Sundays.
Here are some benefits of upcycling:
• Saving money (obviously)
• Supporting your local economy and helping to create jobs
• Helping the environment by reusing existing materials
• Reducing the amount of factory-produced clothing you buy
• Impressing your friends by telling them, “I made this,” when they inevitably compliment you on your super cute outfit
• Similarly, impressing your frugal friends by telling them, “This (enter article of clothing here) cost $2”
• The satisfaction of knowing that you made something awesome
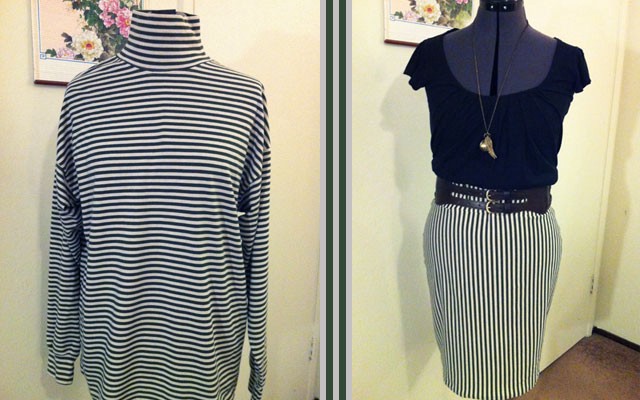
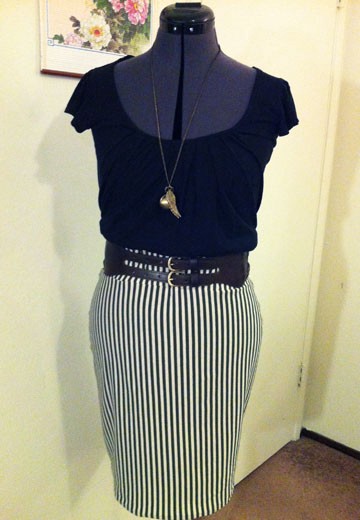
So, without further ado, here’s a quick tutorial to get you started on your upcycling journey. Today we’ll be upcycling a large men’s striped cotton turtle neck that I found at Thrift Town in the Mission District of San Francisco for about $2. We’ll be transforming this forgotten article into a comfy American Apparel-esque pencil skirt that can be worn to the office or out to your favorite fancy bar, where you’ll hopefully be paying happy hour prices.
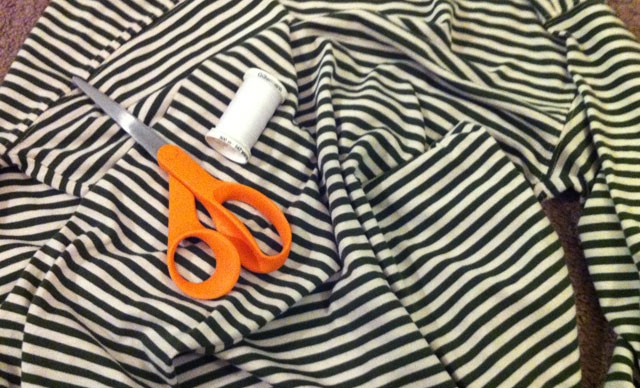
What you’ll need for this project:
• A large men’s long-sleeved shirt
• Scissors
• Matching thread
• Measuring tape
• A sewing machine (or a serger if you’re fancy)
• Your body, your roommate’s body, or a body form (which is what I’ll be using)
• About an hour of your time
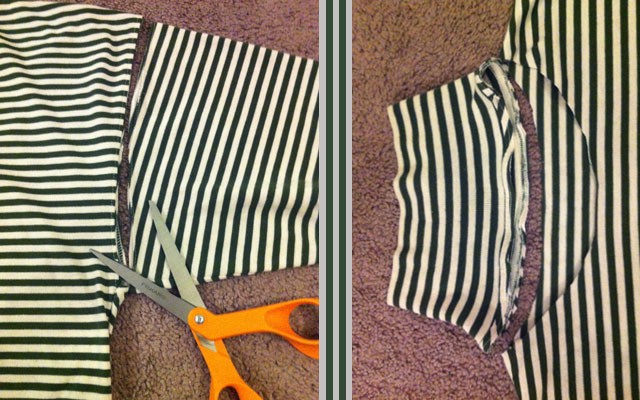
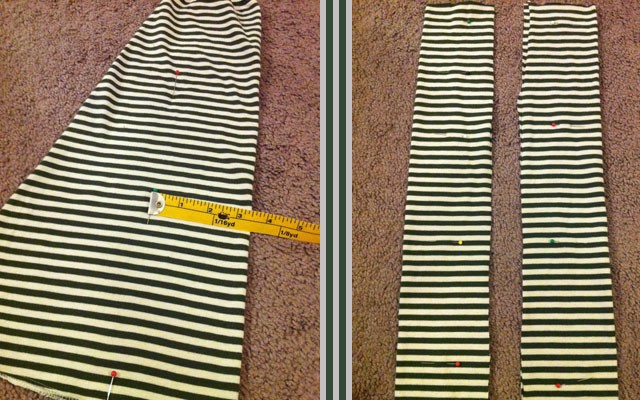
Step One: First, remove the sleeves and the collar/turtle neck.
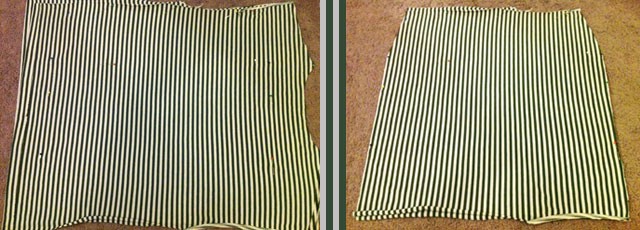
Step Two: Cut the shirt up the sides, and leave the two pieces neatly lined up. Take a measurement of your waist 1 inch below your belly button, (or 2.5 inches below your waist) and your hips. Divide each number in half (this is your flat measurement) and mark your fabric accordingly with pins (stick pins through the two pieces, which will hold them together for now).
Step Three: Now, grab those sleeves you removed earlier. We’re using these bad boys to make a waistband. Flatten out your sleeves and measure a 3-inch width, mark with pins and cut. Repeat with other sleeve. (Please note: You’re only cutting one side, the other remains folded.)
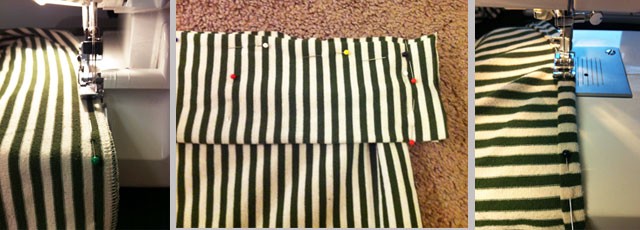
Step Four: Back to the main skirt. Sew, or serge (I used my trusty Brother serger) the skirt using your pins as your guide. Try on the skirt and make any necessary alterations. Next, pin the folded waistband to your skirt (if using striped fabric, be sure to line up those stripes!). Once pinned, serge/sew the sides of the waistband together. Then, serge/sew the waistband to the skirt using the pins as your guide. Lastly, hem the bottom of your skirt by folding the fabric about 1/4 inches twice (held by pins) and sewing a hem line.
And, voila! You should have a comfy, yet fitted, upcycled skirt!
Tatiana Jimenez is a marketing person at a credit union in San Francisco, where she has learned financial responsibility through osmosis. She also blogs about design and DIY projects on her website.
Support The Billfold
The Billfold continues to exist thanks to support from our readers. Help us continue to do our work by making a monthly pledge on Patreon or a one-time-only contribution through PayPal.
Comments